Not long after I said “YES” to Michael’s proposal, the wedding planning wheels started turning in my head. I am a self-described “girly girl”, but believe it or not I had no preconceived notions about my own wedding. I would drool over other people’s engagement and wedding photos, but never gave much thought to what mine might be like. I didn’t have any colors or flowers picked out, no venue I had my heart set on, not even the slightest idea of what I wanted my dress to look like. So I started from a very unbiased “Square 1”.
The two things I did know were: 1) we didn’t have a huge budget to work with, and 2) after talking with Michael, we were resolved to keep it as small and intimate as possible. The last thing we wanted to do was spend the entire day feeling obligated to speak to hundreds of guests. Not because we didn’t want to, but because the time frame of a wedding reception really isn’t long enough to have a genuine conversation with all of the people you love. So we decided good food, family, our closest friends, and the sunny San Diego weather were all we needed.
Therefore, some extravagances were set aside and my DIY skills were put to the test! We decided our theme would be “Rock & Romance”. A little bit of old, a little new, some glam, some wild, and lots of sparkle. After weeks of looking through wedding magazines, Pinterest, and talking with past brides, I decided the few things I could coordinate or make myself were:
- Centerpieces/Table Numbers
- Seating Arrangements
- Reception Signage
- Giveaways
{And if you know me, you shouldn’t be surprised that there was A LOT of glitter and gold involved}
One word ladies… ETSY. Etsy is your best friend while wedding planning. Not only is it a place with endless gorgeous creations made by some very talented people, but it’s also a beautiful brainstorming tool. You can basically search for whatever you need and someone somewhere has made it. If you look on Pinterest, more than half of what you find under the “Weddings” category is found on Etsy. ‘Nuff said.
Centerpieces/Table Numbers
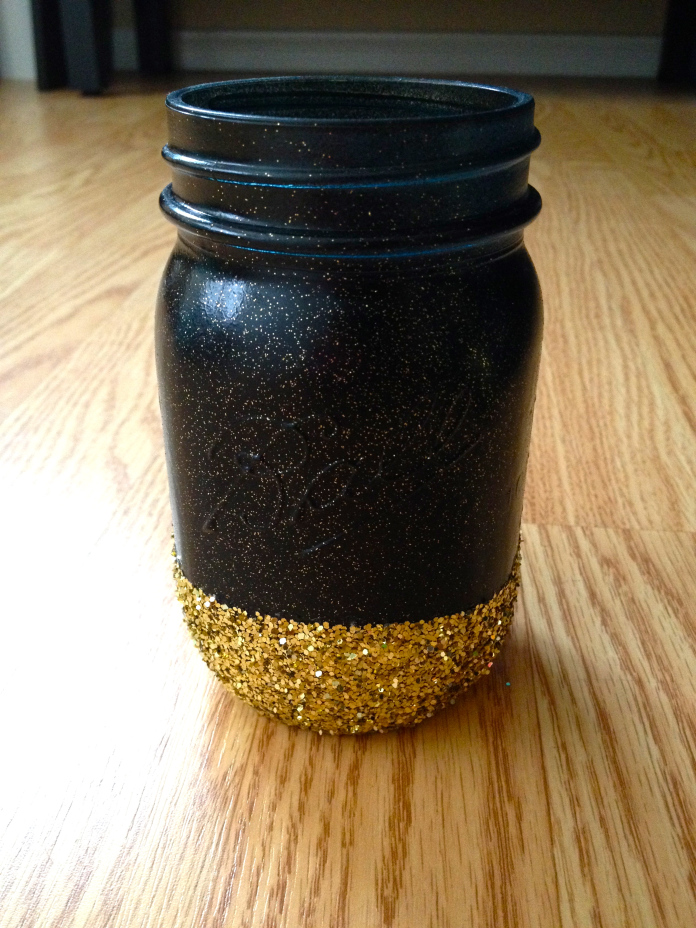
Mason jars of course! I used tried-and-true mason jars for our centerpieces, along with old wine bottles we had saved for the table numbers. A little spray paint, a little Mod Podge, a lot of glitter, and this is what you get:


We had some old mason jars, both clear and blue-hued from a lighting fixture project that never came to be. I found this paint & glitter idea on Pinterest and decided that black and gold were going to be our base colors.
We started by spray painting the jars, alternating between matte black and gold glitter paint. No primer or combo primer/paint needed. Let them dry for at least 24 hours. To create the edge between glittered and non-glittered, use blue painter’s tape or masking tape and wrap around the base of the jar. Raise or lower to get the desired height of the glitter accent. Apply Mod Podge (can be purchased here on Amazon, or at any local craft store) on the jar and sprinkle the bottom half with your choice glitter. Let dry 12-24 hours before removing the tape carefully.
*TIP: Wrap the jar with the tape’s sticky-side AWAY from the jar, and secure by sticking the ends tightly on top of each other. Otherwise the spray paint will come off on the tape if you apply the sticky-side directly onto the jar.

We spray painted old wine bottles with matte black spray paint and then dusted them with a gold glitter spray. Same thing we did for the black mason jars. The table numbers were ordered from Etsy, by TimeLess Things.
Seating Arrangements
I knew I wanted something pretty and easy to read for our seating arrangements. It’s a little trying when you go to a wedding and spend more than a few minutes looking for where you can put your purse down. I found this great idea on WeddingWire using a wine cork board, corsage pins, and paper circles (see original photo here).
Along with those old wine bottles, we’d also been saving the corks that went with them. “This is going to be perfect!”, I thought. I have almost everything I need! Just missing the frame and a hot glue gun. What I didn’t realize is that I’d need to cut those corks in half lengthwise to sit flush against the frame backing… Luckily, I had help from my brother and Michael because that part of the project alone took about 2-3 hours (!!!). After the corks were cut, it was time to arrange and hot glue them to the frame backing. I used a standard hot glue gun and spent about 2 1/2 hours on my living room floor making this beauty:


Reception Signage
I loved how creative people were getting with their reception signage – – welcome signs, signs for food menus, dessert tables, etc. But I can’t tell you how much I agonized over our signs. With all the different font types, spacing, and sizing, I must have designed and re-designed these signs a hundred times before the actual wedding day. And I was only using Microsoft Word! So I was extremely limited in font types, which may have been a blessing in disguise.
I printed them on the same off-white cardstock as the seating arrangement circles and used a combination of easy to find 4×6, 5×7, and 8 1/2 x 11 frames:


Giveaways
I found our giveaways by chance while browsing TheKnot. Since we were going for a bit of an old-worldly feel with our “Rock & Romance” theme, these antique key bottle openers were perfect. Useful and fun! And much better looking on your key chain than that cheesy Budweiser giveaway you got at that bar one time. Find them on The Knot Wedding Shop here.
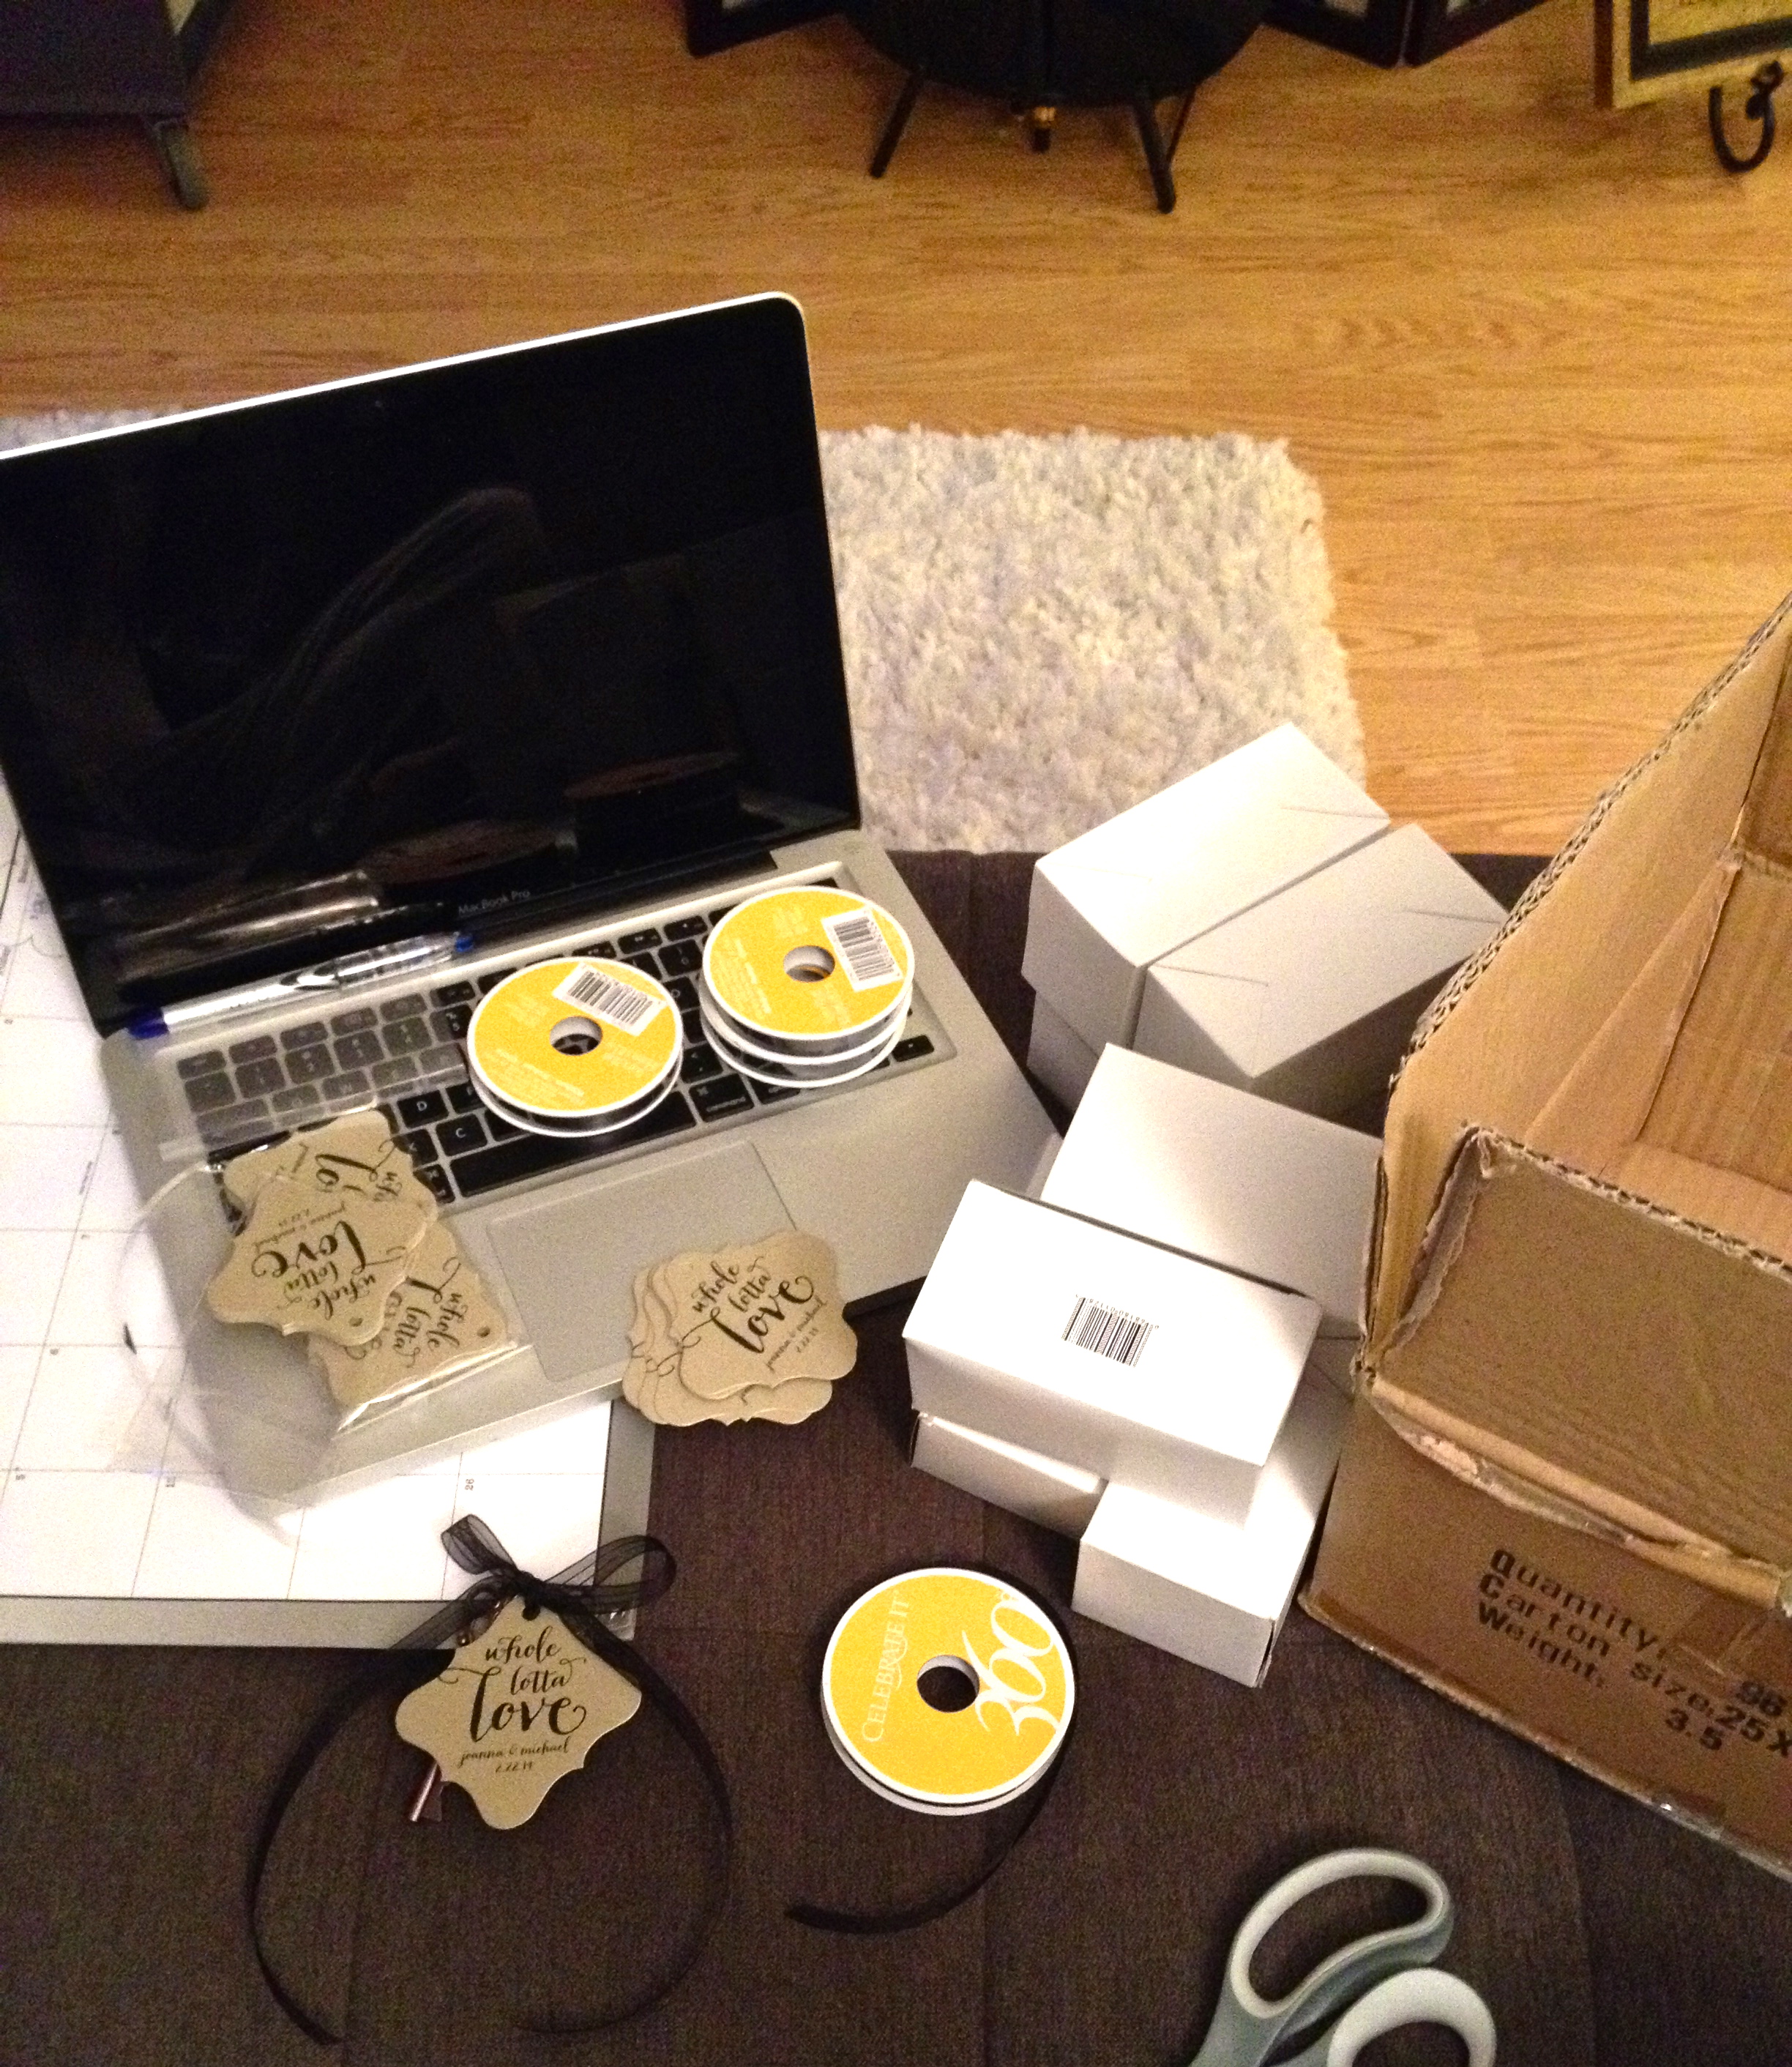
I also wanted cute gift tags attached to the keys and by this time, I was too exhausted to try and design them myself. So I went back to Etsy and ordered these beautiful personalized tags from marrygrams, with a ode to Led Zeppelin. Rock & Romance theme… get it? They turned out perfect and shipped on time!


My workstation – – used thin, sheer black ribbon to attach the tags to the keys:
Our wedding turned out better than I could have imagined! Sure there were some things that didn’t go exactly right, but there was so much love and happiness surrounding us, I didn’t even care or notice until after it was all done. I do realize that no matter how much I worried about the signage or the centerpieces or the flowers, no one really remembers those details. What I do remember from other weddings is the couple getting married and how I felt as they let me be a part of their special day. I wanted our day to reflect us, which truly drove my choice to DIY these projects. The best part of it all was right after the ceremony, Michael and I arrived at the venue first to take photos and I got to see all of our hard work set up. It was an incredibly happy, accomplished feeling.
To those planning weddings in the near future – – have so much fun and enjoy the process! It’s a crazy, beautiful ride.
xo Joanna
