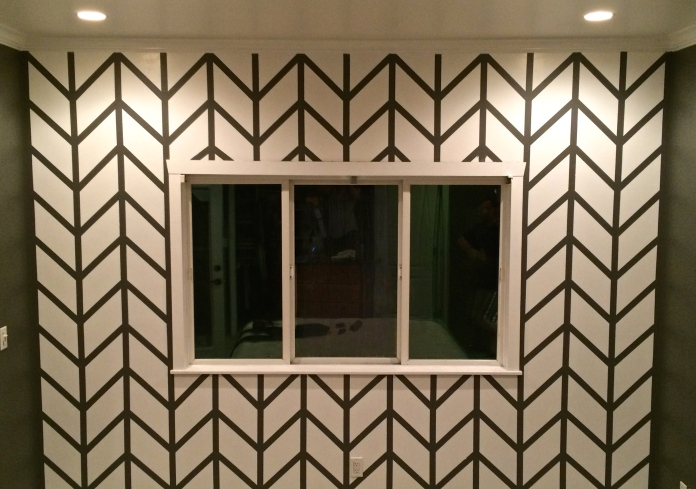
Let me first start with our awesome after picture. We now have a pretty sweet accent wall in our bedroom, all thanks to Pinterest and some major determination (and patience!) by me and the husband.

This project was only supposed to take two days MAX. It ended up taking more days, gallons of paint, and total trips to Home Depot than I care to divulge here. It started with this gorgeous idea I found on Pinterest from a blog called Thrifty & Chic. You can find the post here. Below is the photo idea that inspired it all.

Gorgeous, right?! And her step-by-step instructions are so easy to follow! It wasn’t a hard sell to Michael either, which was a miracle that we both immediately agreed on a decor idea. Our bedroom started out a tan-ish, olive-ish color with a purple accent wall. Yup, purple. It was the one room in our house I knew we’d probably repaint. Otherwise, I’m in love with how the previous owner painted all of the other rooms! I’m as shocked as you are.
We started by picking colors. Gray and white seemed pretty neutral. I envisioned cool colors that were relaxing, but edgy enough to be modern and warrant the name “accent wall.” We decided to go with Benjamin Moore’s “Kendall Charcoal” as the base color. The accent wall would be white with gray chevron stripes. Turns out the gray was darker than we anticipated, but it works out since our room is currently without curtains and at sunrise it’s like the heavens are opening up right in our bedroom.
Paint the wall with the desired stripe color as the base coat.


Then… the taping. First, decide on the width of blue tape as this will be the width of your stripes. Then, take your wall dimensions and start a sketch to determine spacing and direction. This step took the most amount of brain power. Measurements need to be exact to attain the desired look. Once you determine the distance between the vertical lines, start taping. After the vertical tape pieces are set, measure and tape each of the diagonal chevron stripes.


Don’t get discouraged! This is the loooongest part of the whole project. It can be especially frustrating when you realize after taping the first few rows, that you’ve measured incorrectly and the stripes are totally crooked. And then you have to start over. Yes, that happened to me.
*IMPORTANT* The writer of the Thrifty&Chic blog highly recommended running over the tape lines with a credit card or something comparable. Ensure the tape edges are completely flush against the wall. Otherwise paint will seep underneath the tape and your stripe lines won’t be as clean.
Next step, more paint. After all the tape is up and you’re happy with the overall look, paint the second “background” color over the tape. More than one coat may be necessary depending on the colors you’ve chosen.

Let the paint dry overnight. Once dry, begin peeling off the tape! Start at the top and bottom edges and peel slowly toward the middle of the wall. This was the most satisfying step of the entire project.

And voila! You have a gorgeous new wall.

We couldn’t be happier with the finished product. I’m pretty sure we earned our official homeowners’ badges in the process since we stayed in on a Friday AND Saturday night to finish this project, and actually enjoyed it. We still need to add some finishing touches to the room, e.g. curtains, wall decor, accent pieces, etc. but I think we’ll pace ourselves on the rest.
Happy painting everyone!